
Welcome to our series exploring the modules, known as steps, within LogCore Auto! In each post, we’ll dissect a different step to help you harness its power.
Today, we’re kicking things off with a focus on the HTTP step – an essential tool for seamless integrations. Let’s dive in and uncover how this step can supercharge your workflow!
The Http step is a vital feature within our platform, simplifying communication with external systems and services via API requests. With this tool, users effortlessly integrate with various third-party applications and services, enabling real-time data exchange. This flexibility empowers users to automate workflows, retrieve and manipulate data, and trigger actions seamlessly. Whether it’s retrieving data from a cloud-based CRM, posting updates to a social media platform, or interacting with an e-commerce website, the Http step is a versatile asset for streamlining processes and boosting efficiency.
Let’s delve into the versatility of the HTTP step by exploring its various settings and configurations. As a cornerstone of our platform, the HTTP step offers users a range of options to tailor their integration workflows to their specific needs. From specifying request methods and headers to defining authentication protocols and handling response data, each setting plays a crucial role in shaping the behavior of the HTTP step. Join us as we navigate through these settings, uncovering the power and flexibility they provide in crafting seamless integrations.

Source
Within the Source dropdown, you’ll find your system configurations, crucial for accessing various APIs and making HTTP requests. This dropdown is integral to configuring your HTTP requests effectively.
Learn more about system configurations (Coming Soon) ->
By default, the Source configuration is set to Custom Request. This option enables you to make requests spontaneously, without prior setup. Simply specify the URL, headers, and response content template, and send your request effortlessly.
Moreover, the source system configuration streamlines authentication processes for API access during runtime and debugging, ensuring seamless integration.
Source api documentation
Once you’ve chosen a source system configuration, you’re set to add the essential URL, parameters, headers, and content needed to send your request. To assist you in this process, we’ve integrated OpenAPI documentation directly into the settings of the HTTP step. Accessing this documentation is simple: just click on the API Doc button associated with your selected source system.
Within the documentation, endpoints and methods (such as Get, Post, Put, Patch, and Delete) are neatly organized for easy navigation. Additionally, a search box is available to swiftly locate the specific endpoint you’re interested in exploring.
Once an endpoint is selected, the URL, necessary headers and response content will be automatically populated.


- Example URL:
https://api.example.com/orders/{{$.orderId}}- Output (if
orderIdis “123”):https://api.example.com/orders/123
- Output (if
- Example URL:
https://api.example.com/products?category={{$.category}}&price={{$.maxPrice}}- Output (if
categoryis “electronics” andmaxPriceis “1000”):https://api.example.com/products?category=electronics&price=1000
- Output (if
- Example URL:
https://api.example.com/sales?date={{$.currentDate}}- Output (if
currentDateis “2024-02-25”):https://api.example.com/sales?date=2024-02-25
- Output (if
These URLs demonstrate how dynamic placeholders (interpolation) can be used to include variable data within the URL, such as order IDs, product categories, prices, and dates.
URL
In the URL textbox, you’ll enter the web address of the destination where your request is sent. While you can manually input the web address, there are often scenarios where you’ll need to incorporate dynamic details such as the current time or specific identifiers like IDs into the URL.
To help with this, we’ve introduced a feature called “dynamic placeholders.” These allow you to include special codes that will be replaced with real data when the request is sent. For example, if you want to only fetch new orders from a web shop created in the last 5 minutes, you can use formulas to represent the current time and adjust it accordingly.
Additionally, you can also perform data lookups using JSON path expressions. This allows you to extract specific information from the data returned by previous steps in your integration workflow and include it in your URL. This way, you can dynamically adjust the URL based on the data you’ve received, making your integrations more flexible and powerful.
Learn more about formulas and data lookups (Coming Soon) ->
Pagination
When managing large datasets, retrieving all rows in a single request isn’t always feasible. Pagination allows you to fetch data in manageable chunks, ensuring efficient processing
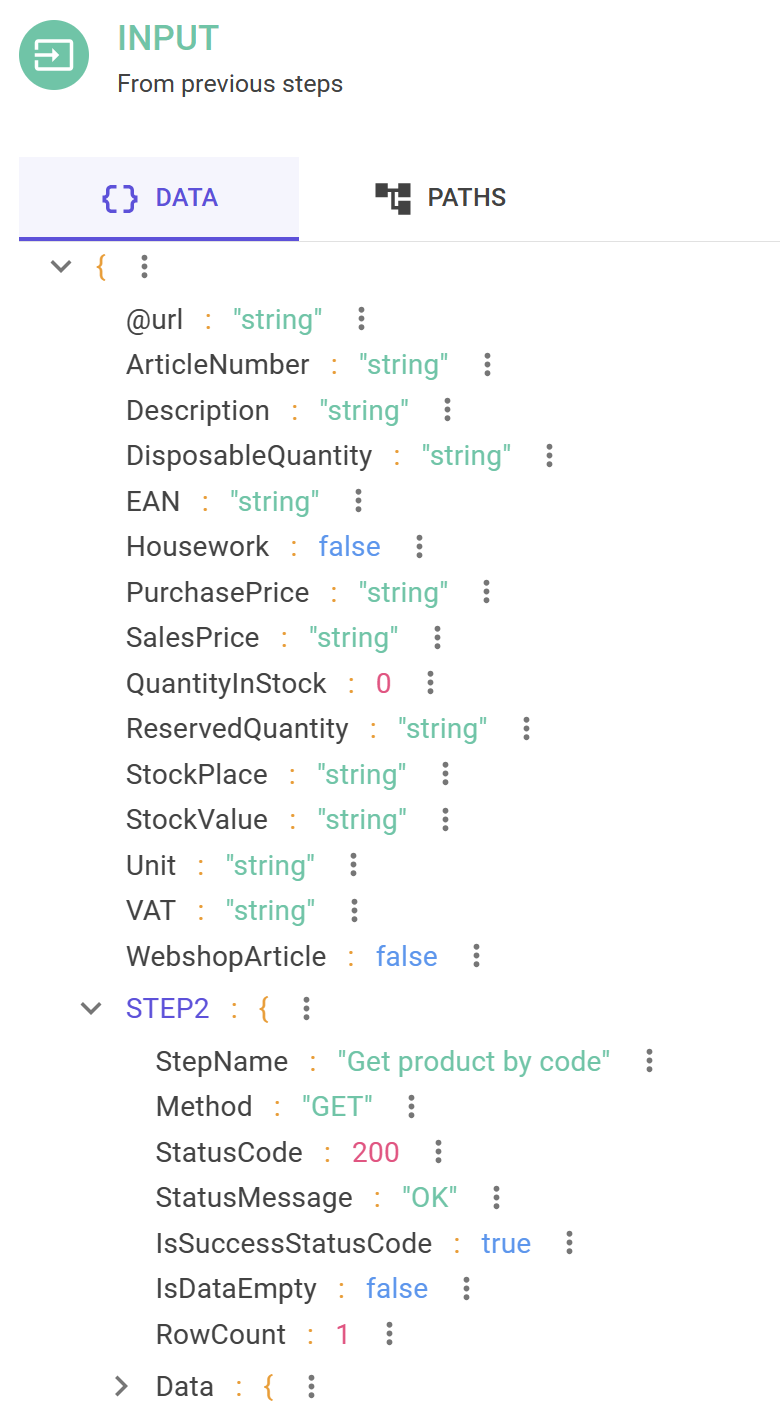
INPUT – Your Source JSON Data
The Input tab contains JSON formatted data retrieved from previous steps, where each step’s output is appended to create a comprehensive dataset. This aggregated data serves as the foundation for mapping to new output JSONs, specifying the body content in POST/PUT requests, or creating URLs with dynamic placeholders, as explained in the URL text above.
When mapping, all this data is readily accessible through JSON path expressions, allowing seamless integration and manipulation within your workflows.
The data you see in the Input tab comes from the output tab of previous steps. It includes the response data from the API documentation, as explained earlier, or any data that has been manually entered. This setup enables the simulation of response data expected during integration execution. However, this placeholder data will be substituted with actual live data once the integration is executed. This helps users to design and create integrations seamlessly, even without direct access to an API. Simply relying on the OpenAPI documentation proves sufficient for initial development phases.
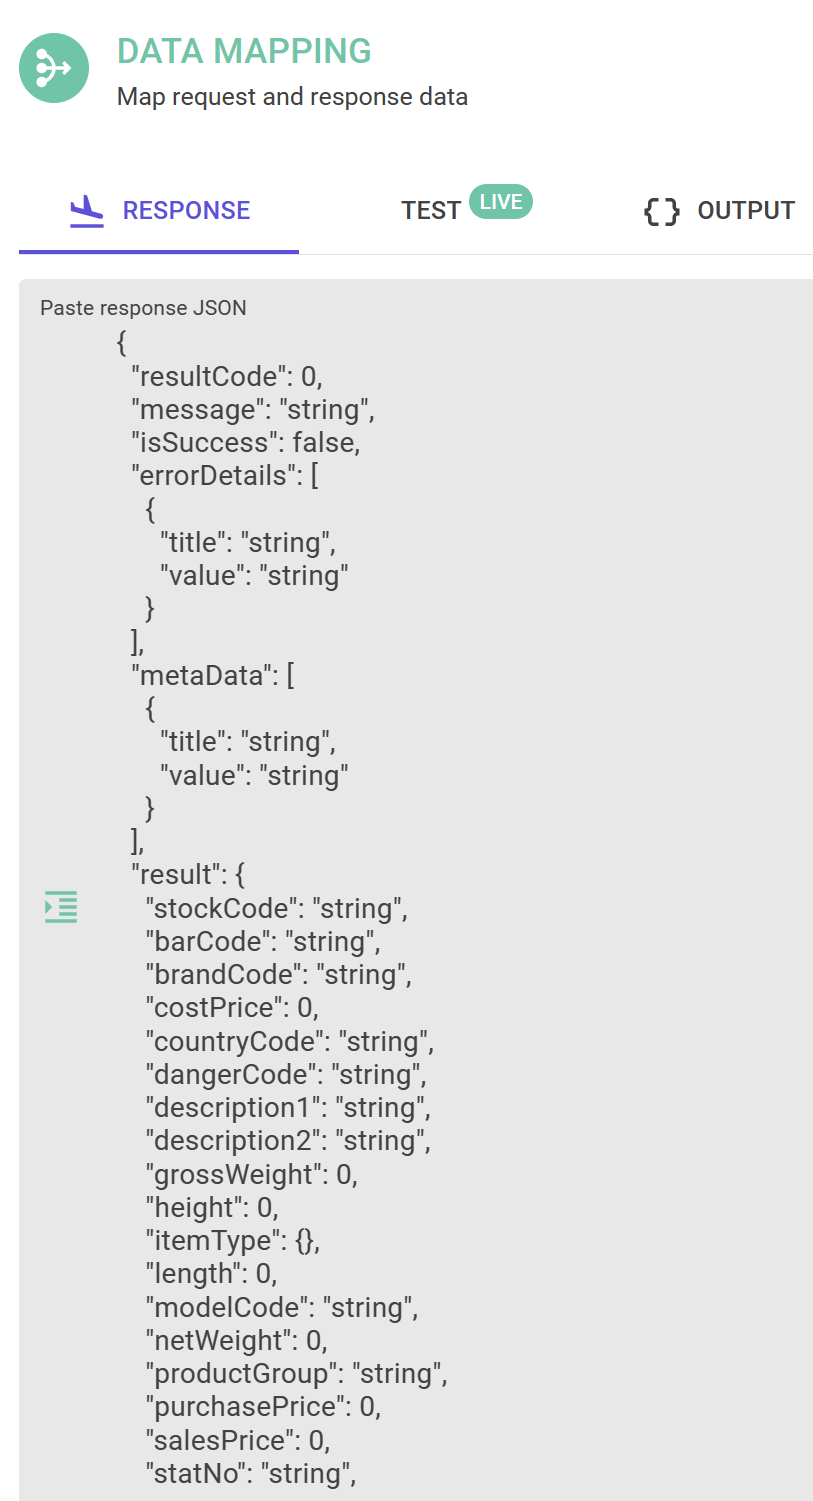
RESPONSE CONTENT
In the Response tab, you’ll find the JSON-formatted data generated by the current step. This data is appended to the step’s input to form the output dataset. It serves as the result of the step’s execution and is typically passed on to subsequent steps in your integration workflow.
The data is primarily sourced from the API OpenAPI documentation, which is the preferred method for ensuring consistency and accuracy in response content. However, in cases where the OpenAPI documentation is unavailable or incomplete, users have the option to manually enter the response content.
This output JSON data plays a vital role in shaping the overall integration process. It contains the information processed and transformed by the current step, ready to be utilized further downstream. Whether it’s passing along modified data, aggregating information, or triggering specific actions, the response content is fundamental to achieving your integration objectives.
Overall, the Response Content tab serves as a crucial component in the integration lifecycle, representing the tangible outcomes of each step’s execution and guiding the flow of data throughout your integration workflow.
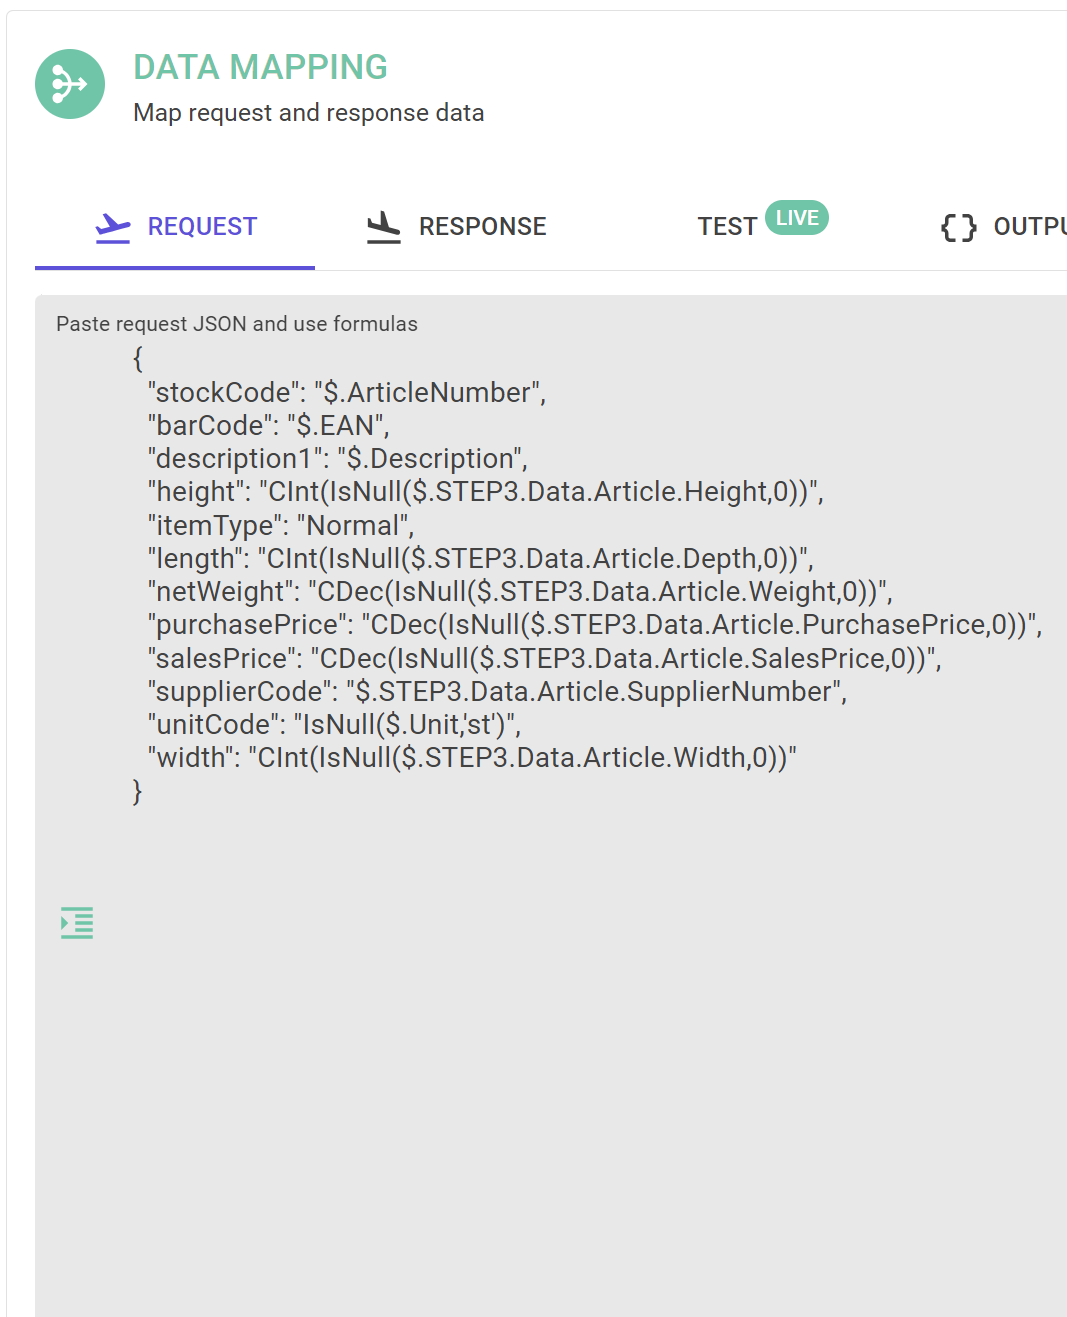
REQUEST BODY
The Request Body section allows you to define the structure and content of the data that will be included in your API requests. Here, you specify the format and details required by the endpoint you are sending data to. This section typically contains JSON-formatted data that maps the information from your integration workflow to the corresponding fields expected by the API endpoint.
Utilize JSON path expressions to dynamically extract specific data from the output of previous steps, enabling precise mapping of information to the relevant fields in the request body. Additionally, leverage formulas within the platform to perform calculations or transformations on the data before it is included in the request, ensuring accuracy and flexibility in your integration workflows.
In this blog post, we’ve delved into the intricacies of crafting efficient API requests using LogCore Auto’s Request features. From mapping data with JSON path expressions to leveraging formulas for dynamic transformations, we’ve explored how to tailor your integration workflows to meet the specific requirements of your API endpoints.
Stay tuned for our next post, where we’ll continue to uncover the powerful capabilities of LogCore Auto and delve deeper into the world of seamless integration. Until then, happy integrating!